Configuring the Oticon Epoq’s Streamer with Windows Vista
Oddly, configuring audio Bluetooth devices with Vista has been turned into something of a convoluted process, but once you get the steps, it’s pretty straightforward. The steps below let me use both the audio and microphone tie-ins for the Streamer within Vista. Many thanks to this page for giving me the steps I needed to turn around and make this work properly. This is not a perfect procedure; you may encounter hiccups with the Streamer losing connection or audio programs crashing.
First, place the Streamer into Bluetooth pairing mode by pressing and holding the Bluetooth button for seven seconds – you will hear one beep two seconds in and another once the pairing mode is activated.
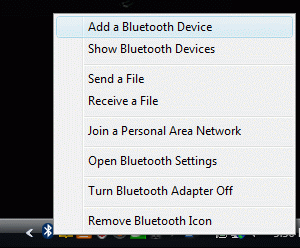
Next, we have to pair the device with the laptop (note that this assumes said laptop has Bluetooth capacity and has the WIDCOMM drivers loaded – if it doesn’t, this sequence may not work). Note that Dell’s Bluetooth devices are automatically installed on the machine using the correct WIDCOMM drivers, so they’re available as a download from them if needed via support.dell.com. If the Bluetooth icon is showing in the system taskbar, then you can simply right click and select “Add Devices”. If not, you have to go to the “Start” menu, open the “Control Panel”, and select “Bluetooth Devices”, then click “Add Wireless Device” button along the top bar.
You are then prompted to select the device that you wish to pair (I turned off all other Bluetooth devices I had floating around to make sure the streamer didn’t get confused and try to do the wrong thing):
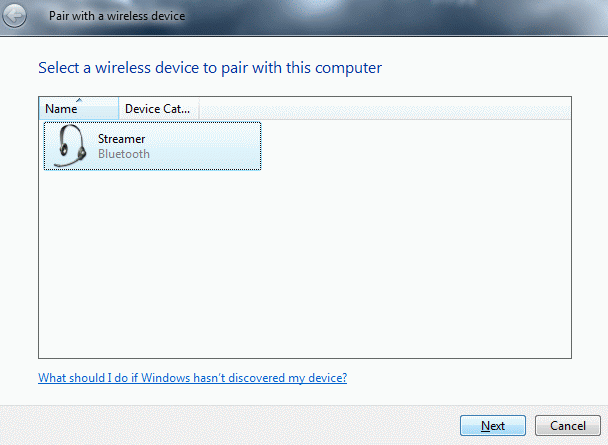
Click the “Next” button with the Streamer selected. Next, you will be prompted to select an option for pairing the device. You want to select the middle option, “Enter the device’s pairing code”:
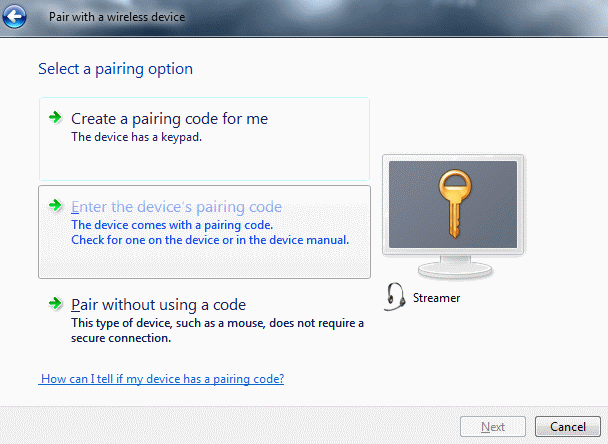
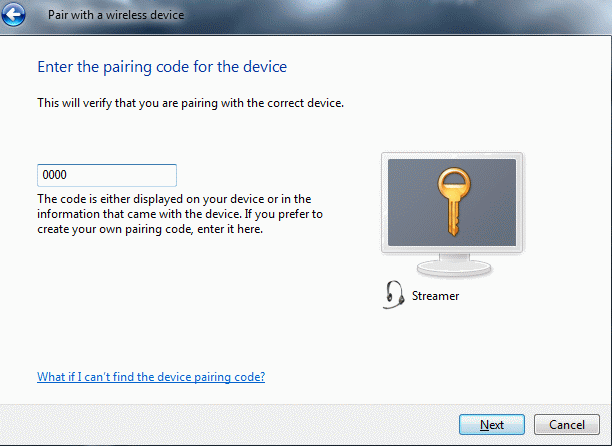
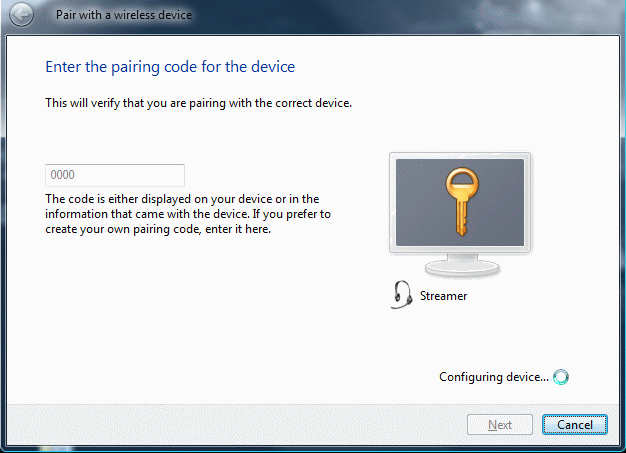
On the next screen, enter the pairing code for the Streamer (0000 – all zeroes) and click “Next”:
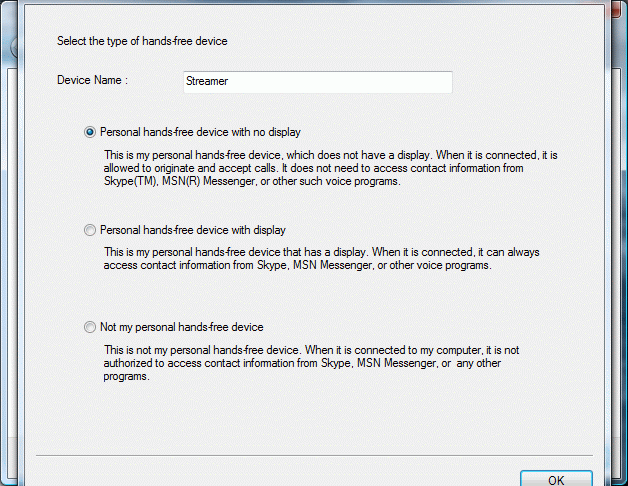
The next screen you see prompts to select the type of hands-free device being connected – take the default option:
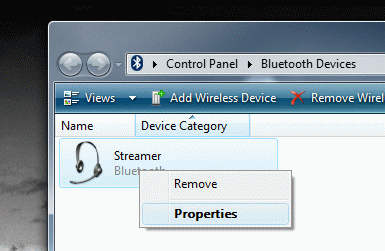
Next, open the “Bluetooth Devices” option screen in the Control Panel if it hasn’t already opened for you and right click on the “Streamer” entry, then click on “Properties”:
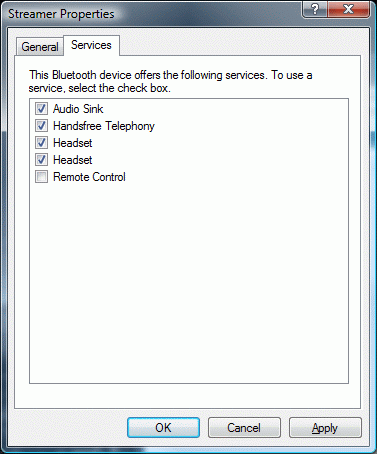
When the Properties pane opens, select the “Services” tab and check all of the available checkboxes except for the “Remote Control” checkbox:
Click “OK” to close the Properties pane. Along the top of the “Bluetooth Devices” window, select “Bluetooth Settings” from the toolbar:

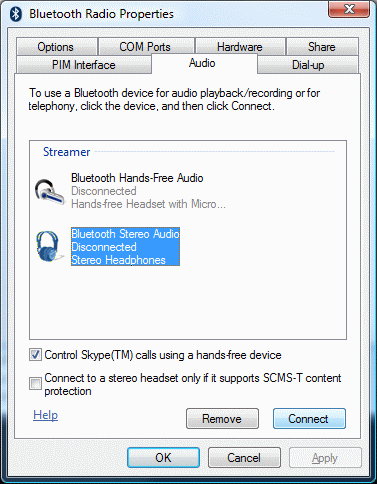
On the “Bluetooth Radio Properties” pane, select the “Audio” tab. If any of these devices list as connected, click on them and then click the “Disconnect” button. Select the “Bluetooth Stereo Audio” option and click the “Connect” button:
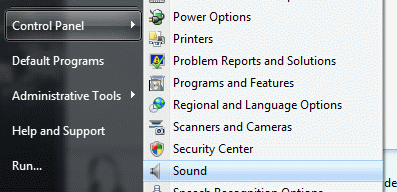
Open your Control Panel again and then click on “Sound”:
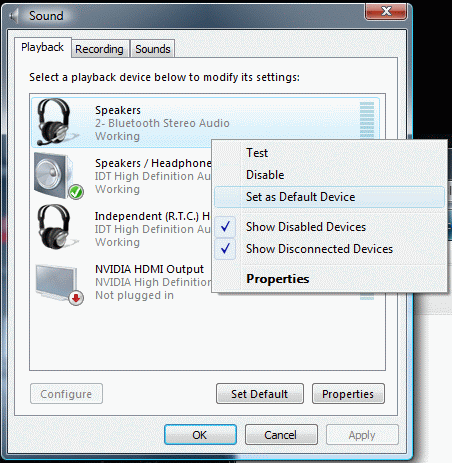
On the “Playback” tab, right click the entry that reads “Bluetooth Stereo Audio” and select “Set as Default Device”. You may have to show disabled or disconnected devices (done via the right-click menu) to see the “Bluetooth Stereo Audio” option – if done correctly, that option should be there without having to do anything further.
Now open your favorite audio program and play away!
Note that I have not been able to resolve issues where iTunes (my music player of choice) may randomly decide to crash under this arrangement. I also have noticed that the device itself sometimes will simply disconnect for no clear reason, which means trying to force it to reconnect using the “Bluetooth Radio Properties” dialog box above.